Android - 自定义字体
在 android 中,您可以为应用程序中的字符串定义自己的自定义字体。 您只需从 Internet 下载所需的字体,然后将其放在 assets/fonts 文件夹中。
将字体放入字体文件夹下的 assets 文件夹后,您可以通过 Typeface 类在您的 java 代码中访问它。 首先,获取代码中文本视图的引用。 它的语法如下 −
TextView tx = (TextView)findViewById(R.id.textview1);
您需要做的下一件事是调用 Typeface 类的静态方法 createFromAsset() 以从资产中获取您的自定义字体。 它的语法如下 −
Typeface custom_font = Typeface.createFromAsset(getAssets(), "fonts/font name.ttf");
您需要做的最后一件事是将此自定义字体对象设置为您的 TextView Typeface 属性。 你需要调用 setTypeface() 方法来做到这一点。 它的语法如下 −
tx.setTypeface(custom_font);
除了这些方法之外,Typeface 类中还定义了其他方法,您可以使用它们来更有效地处理字体。
| 序号 | 方法 & 描述 |
|---|---|
| 1 |
create(String familyName, int style) 给定 family 名称和选项样式信息,创建一个字体对象 |
| 2 |
create(Typeface family, int style) 创建一个与指定现有字体和指定样式最匹配的字体对象 |
| 3 |
createFromFile(String path) 从指定的字体文件创建一个新的字体 |
| 4 |
defaultFromStyle(int style) 根据指定的样式返回默认字体对象之一 |
| 5 |
getStyle() 返回字体的固有样式属性 |
示例
下面是一个示例,展示了使用字体来处理 CustomFont。 它创建一个基本应用程序,显示您在字体文件中指定的自定义字体。
要试验此示例,您可以在实际设备或模拟器中运行它。
| 步骤 | 描述 |
|---|---|
| 1 | 您将使用 Android Studio IDE 在 com.example.sairamkrishna.myapplication 包下创建一个 Android 应用程序。 |
| 2 | 从 Internet 下载字体并将其放在 assets/fonts 文件夹下。 |
| 3 | 修改 src/MainActivity.java 文件以添加必要的代码。 |
| 4 | 修改 res/layout/activity_main 以添加相应的 XML 组件 |
| 5 | 运行应用程序并选择一个正在运行的 android 设备并在其上安装应用程序并验证结果 |
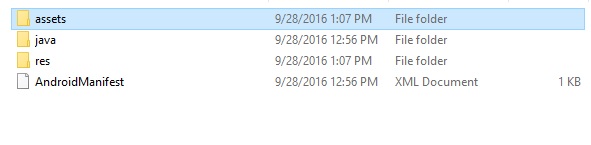
在进入代码部分之前,从 Windows 资源管理器的资产文件夹中添加字体。
以下是修改后的主活动文件MainActivity.java的内容。
package com.example.sairamkrishna.myapplication;

import android.graphics.Typeface;
import android.support.v7.app.ActionBarActivity;
import android.os.Bundle;
import android.widget.TextView;

public class MainActivity extends ActionBarActivity {
   TextView tv1,tv2;

   protected void onCreate(Bundle savedInstanceState) {
      super.onCreate(savedInstanceState);
      setContentView(R.layout.activity_main);

      tv1=(TextView)findViewById(R.id.textView3);
      tv2=(TextView)findViewById(R.id.textView4);

      Typeface face= Typeface.createFromAsset(getAssets(), "font/font.ttf");
      tv1.setTypeface(face);

      Typeface face1= Typeface.createFromAsset(getAssets(), "font/font1.ttf");
      tv2.setTypeface(face1);
   }
}
以下是 activity_main.xml 的修改内容。
<?xml version="1.0" encoding="utf-8"?>
<RelativeLayout
   xmlns:android="http://schemas.android.com/apk/res/android"
   xmlns:tools="http://schemas.android.com/tools"
   android:layout_width="match_parent"
   android:layout_height="match_parent"
   android:paddingLeft="@dimen/activity_horizontal_margin"
   android:paddingRight="@dimen/activity_horizontal_margin"
   android:paddingTop="@dimen/activity_vertical_margin"
   android:paddingBottom="@dimen/activity_vertical_margin"
   tools:context=".MainActivity">

   <TextView
      android:layout_width="wrap_content"
      android:layout_height="wrap_content"
      android:text="Typeface"
      android:id="@+id/textView"
      android:layout_alignParentTop="true"
      android:layout_centerHorizontal="true"
      android:textSize="30dp" />

   <TextView
      android:layout_width="wrap_content"
      android:layout_height="wrap_content"
      android:text="Tutorials Point"
      android:id="@+id/textView2"
      android:layout_below="@+id/textView"
      android:layout_centerHorizontal="true"
      android:textSize="35dp"
      android:textColor="#ff16ff01" />

   <TextView
      android:layout_width="wrap_content"
      android:layout_height="wrap_content"
      android:text="Tutorials Point"
      android:id="@+id/textView3"
      android:layout_centerVertical="true"
      android:textSize="45dp"
      android:layout_alignParentRight="true"
      android:layout_alignParentEnd="true"
      android:layout_alignParentLeft="true"
      android:layout_alignParentStart="true" />

   <TextView
      android:layout_width="wrap_content"
      android:layout_height="wrap_content"
      android:text="Tutorials Point"
      android:id="@+id/textView4"
      android:layout_below="@+id/textView3"
      android:layout_alignLeft="@+id/textView3"
      android:layout_alignStart="@+id/textView3"
      android:layout_marginTop="73dp"
      android:textSize="45dp" />

</RelativeLayout>
以下是 res/values/string.xml 的内容。
<resources>
   <string name="app_name">My Application</string>
</resources>
以下是 AndroidManifest.xml 文件的内容。
<?xml version="1.0" encoding="utf-8"?>
<manifest xmlns:android="http://schemas.android.com/apk/res/android"
   package="com.example.sairamkrishna.myapplication" >

   <application
      android:allowBackup="true"
      android:icon="@mipmap/ic_launcher"
      android:label="@string/app_name"
      android:theme="@style/AppTheme" >

      <activity
         android:name=".MainActivity"
         android:label="@string/app_name" >

         <intent-filter>
            <action android:name="android.intent.action.MAIN" />
            <category android:name="android.intent.category.LAUNCHER" />
         </intent-filter>

      </activity>

   </application>
</manifest>
让我们尝试运行我们刚刚修改的自定义字体应用程序。 我假设您在进行环境设置时已经创建了 AVD。要从 Android Studio 运行应用程序,请打开项目的一个活动文件,然后单击工具栏中的 Run  图标。Android Studio 在您的 AVD 上安装应用程序并启动它,如果您的设置和应用程序一切正常,它将显示以下 Emulator 窗口 −
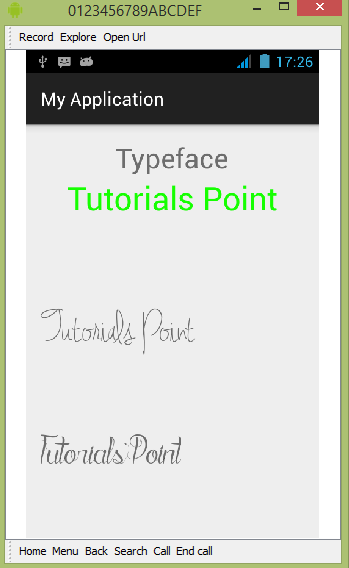
如您所见,出现在 AVD 上的文本没有默认的 android 字体,而是具有您在字体文件夹中指定的自定义字体。
注意 − 使用自定义字体时,您需要注意字体支持的大小和字符。